
Introduction
SSH stands for Secure SHell, and it’s a technology commonly used to secure the communication between 2 computers allowing send commands from 1 computer to the other. Let’s check what is this technlogy with a metaphor and a technical example including how to distribute the keys.
Metaphor
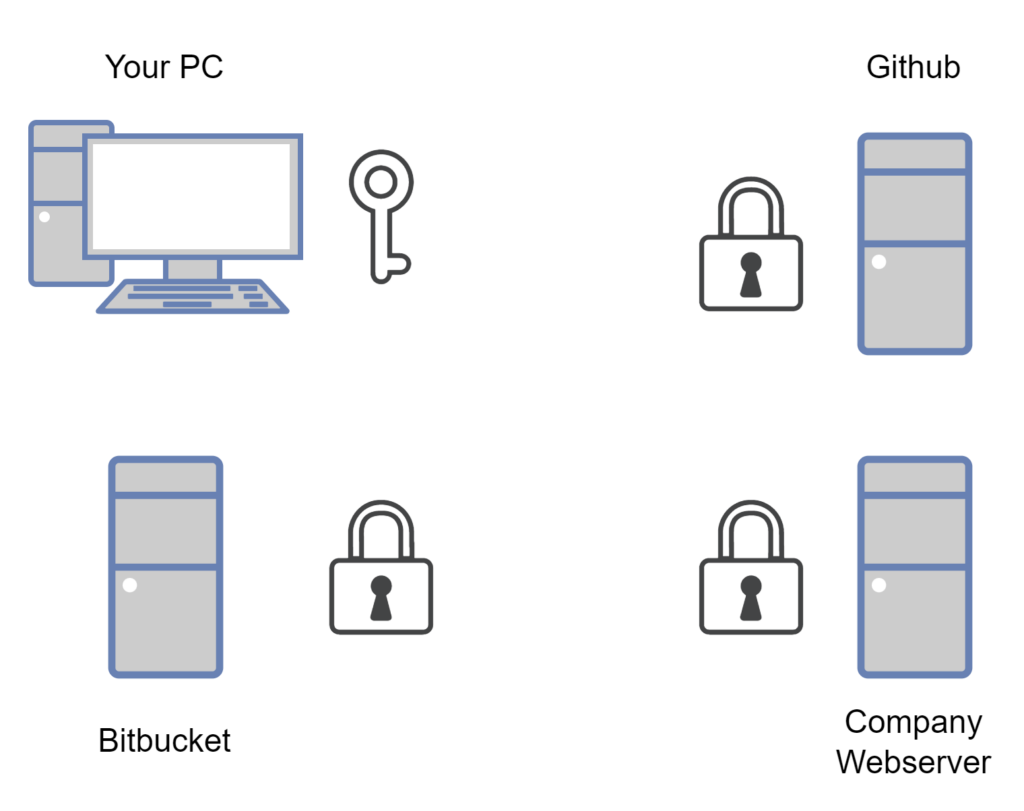
Explaining in a few words, SSH is like to have a key and a padlock, where the key is called the private key and the padlock is the public key. Now suppose you are in a public place (internet), and you find a locker (a server) and you want to store your things (data) there. If you know nobody has your key, you can lock the locker with the padlock, and you will be the only one with access to that locker (server).
Now suppose you can get copies of your padlock, and you use those copies to secure all the lockers, with only one key, you can access all those lockers.
Obviously there are some risks. I believe the most critical thing is in case you lose your key, because you will not be able to open your lockers, so save it in a secure place, but even in secure places there is a risk that someone can access your key, in this case that person could access your lockers. For this reason you can also secure your key with an extra security layer, a secure passphrase; a passphrase is like a password to access your key, and with this extra security, even if someone gets your key, that person will not be able to access your lockers.
Technical Details
Creating Public and Private Keys
Before starting, you need openssh or similar tool that uses ssh, in case you are working in windows and you use git, usually git batch includes a ssh tool, otherwise check the documentation specific to your operating system and install the ssh tool of your preference.
ssh-keygen
In the console execute ssh-keygen and follow the instructions, this command will guide you step by step how to generate the public and private keys.
> Enter a file in which to save the key
> Enter passphrase (empty for no passphrase): [Type a passphrase]
> Enter same passphrase again: [Type passphrase again]
The passphrase is optional, but I highly recommend it (just in case someone gets your private key). Once you add a passphrase, the system will ask every time you want to use it, but there are some tools to avoid this behavior like ssh-agent.
Once you finish the execution of the command, inside of your home folder (in windows is C:\Users\yourusername) should be a folder called .ssh, if you check inside, you will find 2 files. 1. id_rsa, this is your private key and 2. id_rsa.pub, this is your public key.
you can find all the options of this command in https://www.ssh.com/academy/ssh/keygen.
ssh-agent and ssh-add
in case you’ve used a passphrase, you can use these 2 commands to avoid typing the passphrase every time you use ssh.
ssh-agent is the manager of the decrypted private keys, and ssh-add is the command to add the keys, when you add a key, command will ask for the passphrase, and in the future uses, you will not be asked again for it.
Linux systems usually come with these 2 commands and ssh-agent is started when the system starts, and you only need to use ssh-add. Windows system doesn’t have installed by default, so you need to install it (in case you have git bash installed, this usually comes with the 2 commands but they are not initialized when the console starts).
the command to start the manager is
optionally you can indicate the location of the private key, in case you have multiple private keys with multiple names, or in case you choose to use another directory to store the keys.
> eval `ssh-agent`command to add a key to the manager is
> ssh-addI use windows in my personal computer and I have git bash (I love it to use), so I added a .profile file in my home directory to automatically load a command to execute the 2 commands as an alias. the alias is the following
> alias auth='eval `ssh-agent` && ssh-add'when I need to use key I use the command
> authDistributing your public key
Once you have your public and private keys, you only need to distribute your public key to all servers you want to access. feel free to share your public key, there is no way to get the private key based on the public key.
Usually apps such as github or bitbucket allow you to add the public key in their corresponding control panels through the web browser.
In case of servers with ssh access, you only need to find the home folder of your user, inside of the .ssh folder add the key at the end of the file called authorized_keys.
another alternative to add the key to a server is with the command
> ssh-copy-id youruser@server.comThis command will ask for your password and once you are authenticated, it will send your public key to the corresponding authorized_keys in the server.
Using SSH
connecting to a server using ssh is as easy as run the command
> ssh youruser@server.comin server name you can use an IP direction in case your server doesn’t have a domain configured.
Additionally to allow you access to the server, during the execution of the command, the keys are compared and a secure encrypted channel is created using the keys, so in case someone intercepts the data in the process, the data will be not useful because it is encrypted.
Conclusion
Concept of ssh is very simple and allows you to create and secure communications with servers.
Thank you for reading. Sharing is free!